> For the complete documentation index, see [llms.txt](https://help.donary.com/llms.txt). Markdown versions of documentation pages are available by appending `.md` to page URLs; this page is available as [Markdown](https://help.donary.com/cloud-drm/getting-started/setup-and-configuration/advanced-fields.md).
# Advanced Fields
## Overview
**You can access the Advanced Fields tab via the Admin category in the left sidebar.**
Each donor has an individual card where all relevant information is displayed. The DRM platform provides an initial, basic layout that includes core details such as name, address, phone number, and email.
Your organization may need to store *additional* donor information beyond these basics - this is where **advanced fields** come in. This section allows you to add extra details to each donor card, tailored to your organization’s specific needs.
***
## Custom Fields Features
Here you can create **custom fields** that appear on each donor's profile - to store additional information important to your organization.
You can choose between a **free-text** field, where information can be entered manually, or a **dropdown** field with predefined options to select from.
Later, you can filter and sort donors based on these custom fields, making it easy to track, manage, and analyze specific segments or groups.
### **Add custom field**
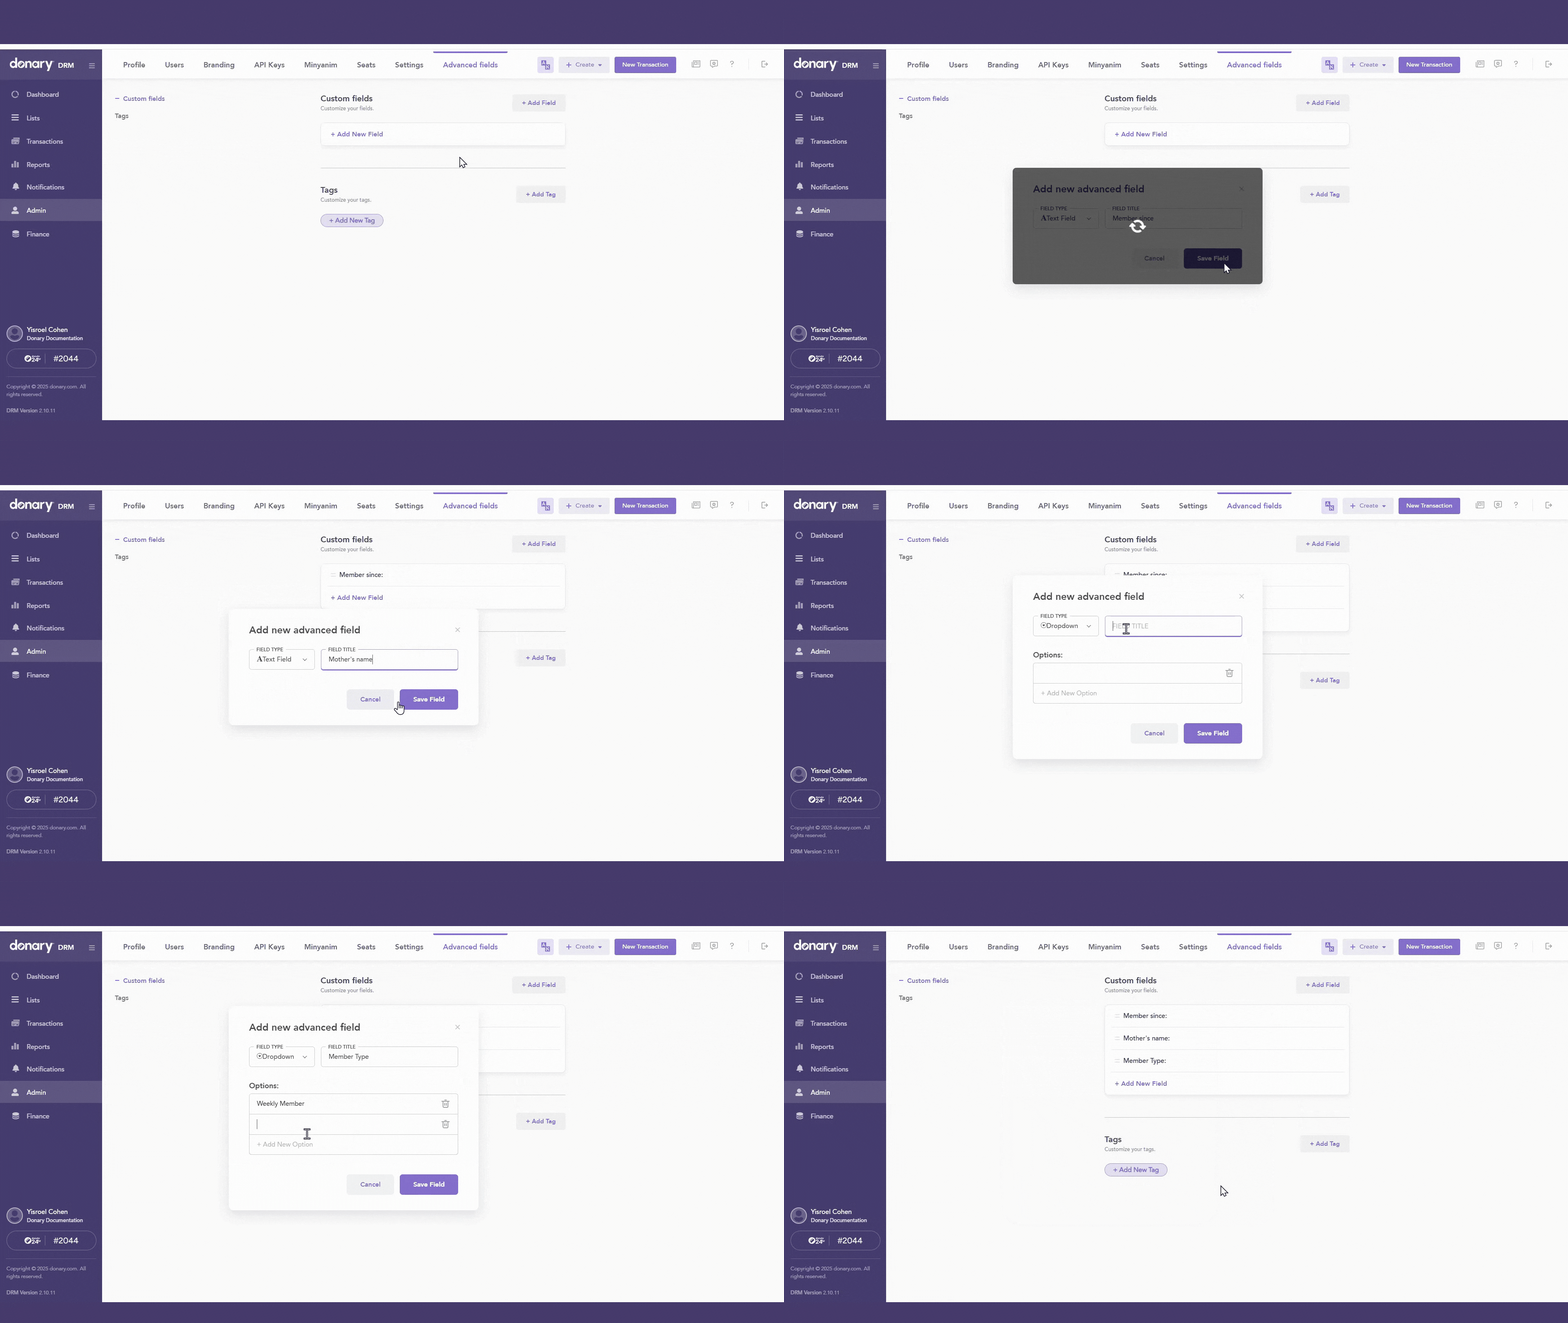
* Click on **Add new field**.
* Select the desired field type: **Free text** or **Dropdown**.
(In example: a "Mother's name" field would be **f*****ree text*** - allowing manual entry of a donors' mother's name. A "Member type" field would be a ***dropdown*** - allowing to choose between given options, such as *weekly member* or *Shabbos member*.)
* Enter a descriptive **Field title**.
(In example: "Member since", "Mother's Name", "Member type" etc.)
* Ensure you click **Save field** to complete the process.
Add a Custom Field - Click on image to enlarge
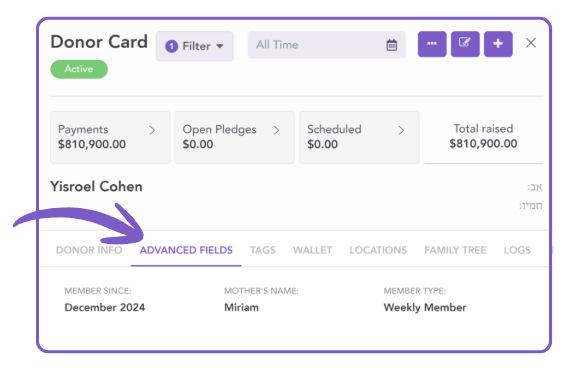
These fields will show in the donors card here:
***
### **Edit a custom field**
* Click the **Edit** icon on the far right of the custom field.
* Make your changes, then click **Save**.
***
### **Delete a custom field**
You can delete a custom field using either of the following methods:
* Click the **Delete** icon on the far right of the custom field.
* Click the **Edit** icon on the far right of the custom field, then select **Delete Field** in the edit window.
{% hint style="warning" %}
**IMPORTANT:** Deleting a custom field will permanently remove the field and all of its data from every donor record.
{% endhint %}
## **Tags Features**
Tags are customizable labels that you can assign to donors for **short-term use**, helping to identify or add supplementary information. They are especially useful for sorting and filtering your donor list, making it easier to manage and organize donor data efficiently.
To facilitate quick recognition and differentiation, you can assign both a name and a color to each tag. A single donor can have **multiple** tags.
You can customize the tags available within your platform here.
### **Add a New Tag**
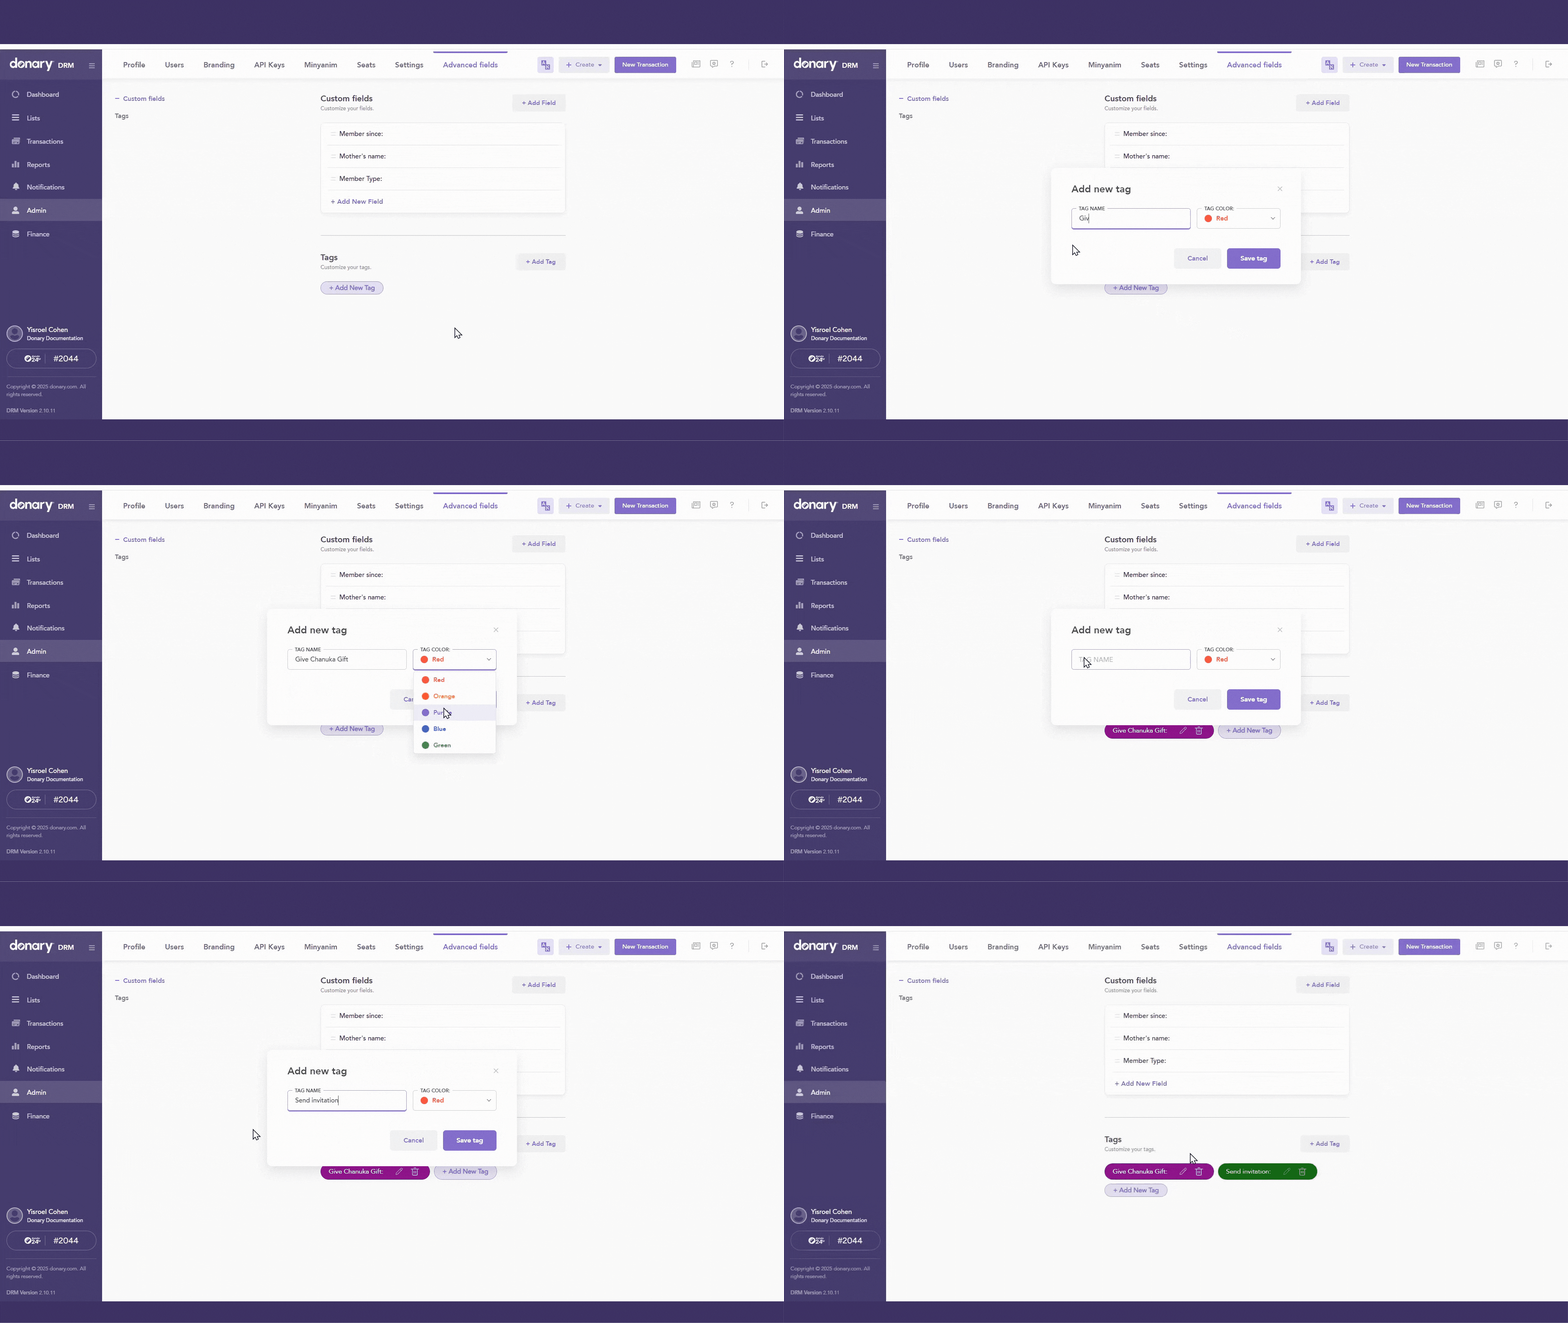
1. Select **Add Tag**.
2. Type in the desired tag name.
(In example: "Send Invitation", "Give Chanuka Gift" etc.)
3. Choose a color for the specific tag.
4. **Save** the tag.
To Add a Tag - Click on image to enlarge
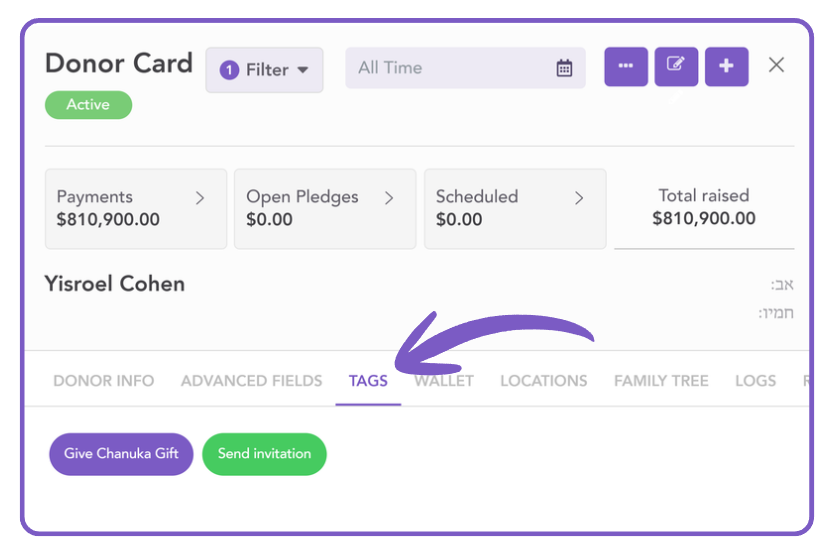
These tags will show in the donors card here:
***
### **Edit a Tag**
* Click the **Edit** icon on the far right of the tag.
* Make your changes, then click **Save**.
***
### **Delete a Tag**
You can delete a tag using either of the following methods:
* Click the **Delete** icon on the far right of the tag.
* Click the **Edit** icon on the far right of the tag, then select **Delete Tag** in the edit window.
{% hint style="warning" %}
**IMPORTANT:** Deleting a tag will permanently remove that tag from every donor record.
{% endhint %}
---
# Agent Instructions
This documentation is published with GitBook. GitBook is the documentation platform designed so that both humans and AI agents can read, navigate, and reason over technical content effectively. Learn more at gitbook.com.
## Querying This Documentation
If you need additional information that is not directly available in this page, you can query the documentation by asking a question.
Perform an HTTP GET request on the following URL with the `ask` and `goal` query parameters:
```
GET https://help.donary.com/cloud-drm/getting-started/setup-and-configuration/advanced-fields.md?ask=&goal=
```
`ask` is the immediate question: it should be specific, self-contained, and written in natural language.
`goal` is what the user is ultimately trying to achieve, the reason they need the answer. Sharing it helps GitBook give you a better, more relevant answer. A goal is most helpful when it describes the outcome the user wants rather than restating the question. For example, with `ask=how do I create an API token`, a goal like `automate deployments from our CI pipeline` lets GitBook tailor the answer to that use case.
The response will contain a direct answer to the question and relevant excerpts and sources from the documentation.
Use this mechanism when the answer is not explicitly present in the current page, you need clarification or additional context, or you want to retrieve related documentation sections.